Cookbooks that Deserve a Look

I love books!  As with anything, there are cookbooks I’ve purchased that are great, and some that have been a little disappointing.  And while I love the challenge of creating something I can eat now with my diagnosed food sensitivities out of a recipe I used prior, sometimes it’s nice to just open a book and make what someone else has already perfected.  The way I figure it, if a cookbook has even one or two recipes for things you love, that makes it worth the money.


First:  The Oh She Glows Cookbook by Angela Liddon

Here is a favourite trick of mine – look at vegan recipes.  That will immediately cut out your dairy and eggs,  I am in no way a vegan – I love meat! – but vegan recipes give a good jumping off point.  Sometimes I have to deal with subbing out nuts, soy, or gluten, but that’s doable.  Some of the things I’ve tried and loved out of this book are the Tropical Green Monster Smoothie, the Our Favourite Veggie Burgers, the Gluten-Free Chocolate-Almond Brownies (obviously I made a substitution for the almonds), and the Fudgy Mocha Pudding Cake.  Ooh – now I’m hungry.  The brownies are arguably the best gluten free brownies I have made.  The book has lots of nice colour pictures and very clear instructions. This one is well worth a purchase.


Second:

The Homemade Pantry – 101 Foods You Can Stop Buying and Start Making by Alana Chernila

I am a bit limited as to what I can make from this book because of my food issues, but still, this book is awesome.  Some of the recipes I have tried and loved are Car Snack 3 (the nutty granola bar), Roasted Tomatoes for the Freezer, Italian Dressing, and Ketchup.  Obviously I made some substitutions in the Car Snacks, but they were still awesome.  Tonight I’m trying out the Maple Popcorn.  This book is chock-full of gorgeous pictures, and personal stories go with almost every recipe.  There are recipes for very simple things, and things that are a little more complicated.

Third:

The Gluten-Free Gourmet Bakes Bread by Bette Hagman

This one was recommended to me by my naturopath.  I haven’t made much out of it yet, but the two things I have made were really good.  I tried the Egg-free Soda Bread, and the Egg-free Crumpets.  I had to substitute the Nut-Quik, but they worked beautifully.  Even just for these two things, this book is worth having.  Breads are something I end up craving and can’t easily find.  Below is a picture of the Soda Bread:

IMG_0356

In the picture from my blog on books, you can see that I have more than three cookbooks.  Potentially we will do a “Cookbook Review – Part 2” post in the future!

Do you have a favourite cookbook?  Leave a message in the comment section and let me know!

Chocolate Mug Cake

Monday we went to the beach.   I LOVE the beach.  I could go there ten times in the summer and it wouldn’t be enough.  It was actually a four generation trip, as we took Mom along, and Kate and the kids came along too.  We got excellent weather, it wasn’t crowded, the children behaved well….all in all, it was a lovely day.

Pictured:  Little Miss C and Mommy’s Steeped Tea tumbler

11222561_530627887086028_5482467554909042635_o


However, with all the sun and water and activity, I got really hungry (and not necessarily for healthy things).  When we got home I had a swift and sudden craving for cake.  Thinking ahead to this week’s blog, I wanted to try something new, and was hit with the idea of allergen free mug cake.  Fast and easy!

Whisk together:

1/4 cup white rice flour

2 tbsp. cocoa powder

1/4 tsp. baking powder

2 tbsp. white sugar

1/8 tsp. salt

It will look like this:


IMG-20150720-00147

Add in, stirring until there are no lumps:

1/4 cup + 1 tbsp. non dairy milk

2 tbsp. vegetable oil

Put into a mug.  I used a super-sized one, in fear it would bubble up.  As you will see in the picture, I might have overestimated the size I would need.  🙂

Now, just for fun, drop one tbsp. of Sunbutter into the batter.  Yum.  Do not mix it up.


IMG-20150720-00148


Now, place your mug in the microwave.  If you fear an overflow, put it on a paper towel.  My microwave is 850 W, and at that power this mug cake took 80 seconds.  80 LONG seconds when you’re waiting for cake.  🙂  When you pull it out, it will look like this:

IMG-20150720-00149

If you are like me, you will not wait for it to cool.  You will eat it greedily with a spoon and blow violently on each spoonful so you don’t burn your mouth.


Notes:

a) Read your cocoa powder label to make sure it is dairy free.  I know of one brand that packages the small and large packages in different facilities.  One size is labelled “may contain dairy”, the other isn’t.

b) I used unsweetened rice milk

c) If you want a sweeter cake, you can add another tablespoon of sugar.  I tried it with 2, and then with 3 (and forced myself to eat both cakes – on two separate days), but 3 was too sweet for me.

The Memories

20150714_094012
We have a big weekend ahead – our first family camping trip!

As you may have gathered in previous posts, we have two young kids – a three and a half year old boy and an (almost) ten month old little girl. Myself and my husband haven’t been camping as adults, only as kids, but we figured, hey, what can go wrong? 🙂

My husband did a lot of camping as a child, and some ‘camping’ when he was in the military. Now that camping was less, “Let’s swim on the beach,” and more like, “Why don’t you exercise all day and then lay down in the snow.” My husband could tell you a great story about being discovered under a layer of ice!

For myself, my family never did camp when I was growing up. My mom….well, she doesn’t like just about anything to do with camping, and we always had my Grandma & Grandpa’s pool for summertime. Thankfully, my kids enjoy swimming just as much as I do!  11262280_10152877647421020_5256564316383404340_n
11692672_10152809595906571_9145718225333534205_n
However, I did go camping two times with a best friend and her family, and these are the only camping memories that I have.

Camping Memory #1 – I am about 10. I have to pee in the middle of the night. I agonize for a long time about whether to wake up anyone or not. I was pretty shy as a child, and truth be told, never really liked sleepovers. Being introverted, I never felt comfortable enough away from home if I needed help with something.

I played out a number of scenarios as to who I should wake up, who wouldn’t be too upset, etc., and finally I just decided to go by myself. I wander down to the bathroom, but on the way back, I forget which lane to turn down to get to our site.

I wander around in the dark for what seemed like FOREVER (probably only about 15 minutes…), and finally make it back and crawl into bed without anyone even noticing.

And no, I didn’t tell my mother about this for a number of years, or else she wouldn’t have let me go camping again!

Camping Memory #2 – Same camp site, same friend and her family, different year. We always went with a group of families from our church. This was fun for eating/cooking together and, of course, going down to the beach.

One night, it was especially rainy and it turned into quite the storm. We had tarps up over our food area to keep the rain off our supper, but somehow we still ended up eating some dirt with our food.

After supper, it was stormy, cold and wet. I was camped out with my friend, her sisters and her mom in their classic old blue cube van.

(No easy transition to include this, so I will just say it: My friend’s mom was a nurse.)

We were busy laughing, telling stories and being dry and happy. All of a sudden, when of the men from our group, Joe (a partially bald man with hair just around the back) came up to the driver’s window where my friend’s mom was sitting.

Joe…had an AXE in his head. A real axe, with real blood, sticking straight out of his head!!

Yep. Those are my two camping memories.

Good to know it will only get better from here! Off for a great weekend with my hubby and our kids, and thankfully a group of our friends, too!

We have been ‘practicing’ with the tent in our backyard this week. We even did some play time in the tent during a rainstorm. Let’s hope we are ready! 🙂

I have a bag full of tea packed, so at least I am set!

Nanaimo Bars

Recently a friend of mine asked if I could make some squares for a bridal  shower she was involved in planning.  She will have two guests coming who have various food requirements.  The way it was stated to me was – “If you can eat it, they could eat it.”  Ha, ha.  With a little trepidation, I said yes.  I mean – I know that I like what I make, and my husband does (but as stated previously, he eats pretty much anything!) but would other people like what I make?

I decided to use this as an opportunity to try converting yet another recipe to my needs.  In flipping through a cookbook I used frequently over the years, I stumbled on the tried and true Nanaimo Bar recipe.  And I knew – I just had to try it.  Here’s what I did to make it edible for me, and a picture of the results!IMG_0353

Bottom Layer:

1/2 cup butter or margarine (I used Vegan Becel)
1/4 cup sugar (I used organic white sugar)
5 tbsp. cocoa (read the label for allergens)
1 chia egg (1 tbsp. ground chia seed + 3 tbsp. water – let sit to gel)
1 3/4 cups allergen free graham cracker crumbs (I used Kinnikinnick)
3/4 cup fine coconut

Second Layer:

1/2 cup butter or margarine (Vegan Becel)
3 tbsp. non-dairy beverage (I used unsweetened rice milk)
2 tbsp. custard powder (I used Horne’s)
2 cups icing sugar

Third Layer:

2/3 cup chocolate chips (I used Enjoy Life)
2 tbsp. butter or margarine (Vegan Becel)

Bottom Layer:  Melt first three ingredients in top of double boiler.  Add your chia egg and stir to cook and thicken.  Remove from heat.  Stir in crumbs and coconut.  Press firmly into ungreased 8 x 8 inch pan.

Second Layer:  Cream Becel, non-dairy beverage, custard powder and icing sugar together well.  Spread over bottom layer.  Place in refrigerator.

Third Layer:  Melt chips and Becel over low heat (or in microwave).  Cool.  When cool, but still runny, spread over second layer.  Chill in refrigerator until needed.

Note:  I made sure to cut before the chocolate was completely cooled, just to make sure I didn’t get cracking and splintering of the chocolate.   I find, in general, Nanaimo bars are better right out of the fridge,  but I tested today, and left one on the counter, covered for three hours.  It was fine, but the middle was slightly runny.


Sunbutter Chocolate Squares

Commercials.  Commercials have a way of making me feel really badly about the way  I need to eat in order to stay healthy.  I cannot go through the drive-through and grab a quick sandwich.  I cannot pop in for a “Hot and Ready” pizza on my way home.  I can’t get a yummy frappuccino or iced latte to cool me off on a hot day.  Forget about thirty-one flavours at Baskin Robbins, or a DQ cake for “every special occasion”. An “all you can eat” buffet is more like an “all you can’t eat” buffet.

But lately, the one that has been mocking me most effectively is the commercial that keeps telling me how fantastic peanut butter and chocolate are together.  And how they are EVEN BETTER cold.  Like I don’t know that.  Like I don’t remember what Reese’s peanut butter cups taste like.  Like I haven’t considered eating one and suffering the consequences, because for that flavour, it just might be worth it.

However, the knowledge of how awful I would feel if I did it, and the fact that I would be deliberately bringing on symptoms eerily close to the stomach flu, on purpose, is enough to stop me.   Given this, I needed to come up with some alternative that would be close in flavour and included ingredients I had in the house.  To that end, I give you…..Sunbutter Chocolate Squares!


1/2 cup Sunbutter (I used smooth)

(Note: don’t use the Sunbutter that gets thick at the bottom of the jar – use the stuff that is nice and smooth, like a peanut butter texture.)

3 tbsp. butter or margarine

1/4 cup + 2 tbsp. brown sugar

1/4 cup white sugar

1/2 tsp. vanilla extract

1 1/2 chia eggs (1 1/2 tbsp. ground chia seed and 4 1/2 tbsp. water)

1/2 cup sweet sorghum flour

1/2 tsp. xanthan gum

1 cup Enjoy Life chocolate chips or mini chips (amount approximate)


Get your chia seeds soaking in water, so they have a chance to become a gel.

Beat the Sunbutter, butter, sugars and vanilla together.  (I just beat with a spoon, by hand).

Mix in chia egg and sorghum flour.  Throw in some chocolate chunks or chips.  (See – this is why the amount is approximate.  I don’t measure them. I just grab some in my hand – yep, my hand – and add until I think there’s enough chocolate in there).  Spread in a greased 6 x 10 pan. Bake at 350*F for 20-25 minutes, or until the edges are lightly browned.  Throw some more chocolate chunks or chips on top, and let sit until they start to melt.  Then gently (so you don’t tear up your pretty squares), with the back of a metal spoon, spread evenly.

And – just because I had some in the house – I sprinkled on some of Steeped Tea’s Raspberry Sparkler.    The end result is here – and the picture features two of the products that had a starring role in these squares.  🙂

Sunbutter Squares

And now, because they are gone, I’m going to go make more!  All things in moderation, right?

The Gluten-Free Dinner Party

If you have read our blog before, you have likely noticed that my mom, well, can’t eat anything, and I can generally eat whatever I want….which is not always a good thing, I might add! My mom, over the past number of years, has cut out gluten, dairy, soy, nuts and eggs from her diet, all in a pursuit of actually feeling well and being able to leave the house!

Growing up, my mom cooked and baked constantly. I enjoyed baking with her, and definitely started trying my hand at making things for myself or others in the kitchen. My mom is very skilled in the kitchen – she can mix & match, swap ingredients and (now) turn a normal recipe into an allergen-free recipe no problem.

Some of her skills were passed to me, but mostly I watch and learn and glean from her knowledge, especially in regards to cooking for those with allergies.
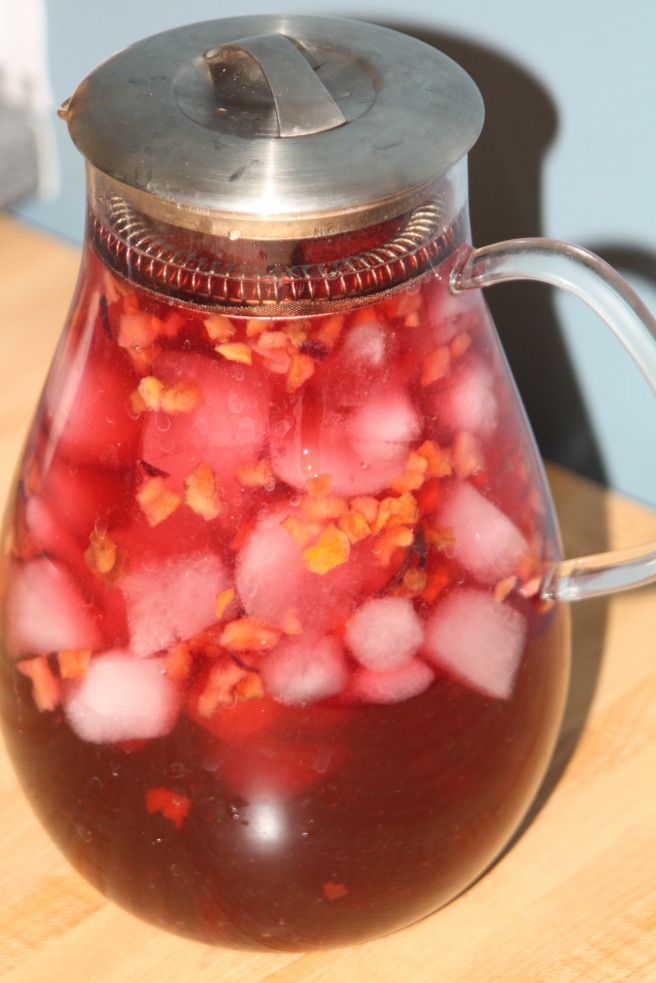
I had a dinner party the other night for some of the leaders on my team. Normally, your first thought with a party would be the food, but this was a party full of tea lovers, so I took care of the iced tea first! A fabulous Sunrise Strawberry iced tea, and another team member was bringing Matcha mixed with orange juice. Just fabulous!
IMG_7194
There were a number of food allergies among the group, so I did my best to work around those, especially knowing from my mom how tough it can be to go somewhere and not be able to eat. I think I did well, for the most part, except for forgetting that one of the guests can’t have eggs….and then making an Angel Food Cake… Oops!

One thing I have learned about allergen-free baking is to keep it simple, keep it fresh, and make it from scratch.

Main Course:
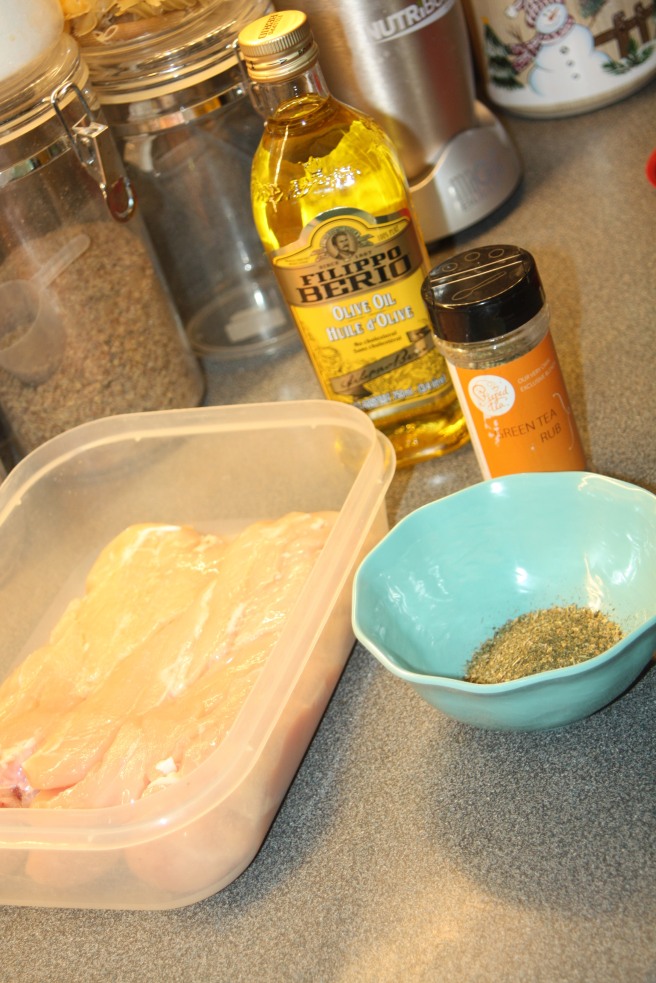
Boneless Skinless Chicken with a Green Tea rub
Holla Holla Burgers

The main course was a simple one – we were BBQ’ing! I threw some boneless skinless chicken in a marinade overnight, and then my hubby threw it on the BBQ – simple! For the marinade, I kept it as simple as I could – a citrusy, fresh green tea rub mixed with olive oil. That’s it! It can easily be allergen-free – you just need to keep looking at your ingredients along the way with every step, and when in doubt, ask someone with allergies if you are doing it right!
IMG_7907
For the IMG_7911
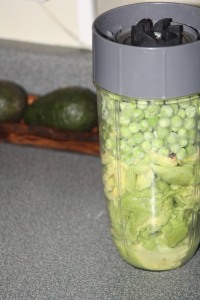
burgers, I used a classic recipe that my family found a few years ago, and I knew it worked for allergies. I did have a little trouble keeping the burgers together, though, I will say. The avocados weren’t ripe enough, and even though I tried this quick trick in the blender, I think it blurred how much I had and I put in too much of the avocado into the mixture. I doubted my instincts, too, and didn’t throw them in the freezer first, which I think would have helped them stay together on the BBQ.
IMG_7913
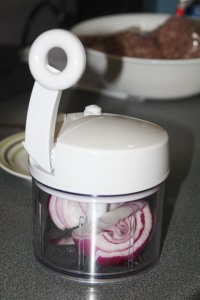
*Quick Tip:  I LOVE this manual food processor from Pampered Chef, especially for things like mincing onions. No tears, no fuss, and no cutting! I love getting my son involved whenever I can with cooking and baking, and even though he is just three and a half, he could easily do this step and be a part of the process. He loves the manual food processor, too…I actually can’t let him see me using it unless I am prepared to have him jump in and help!

Again, this recipe doesn’t have a lot of ingredients, and the only “filler” is avocado, which will be fine unless your guest has a specific allergy to that.

*Note: The next day, I took the leftover, frozen patties and did them in the oven and they were perfect! Always better on a BBQ, I say, but they held together great.

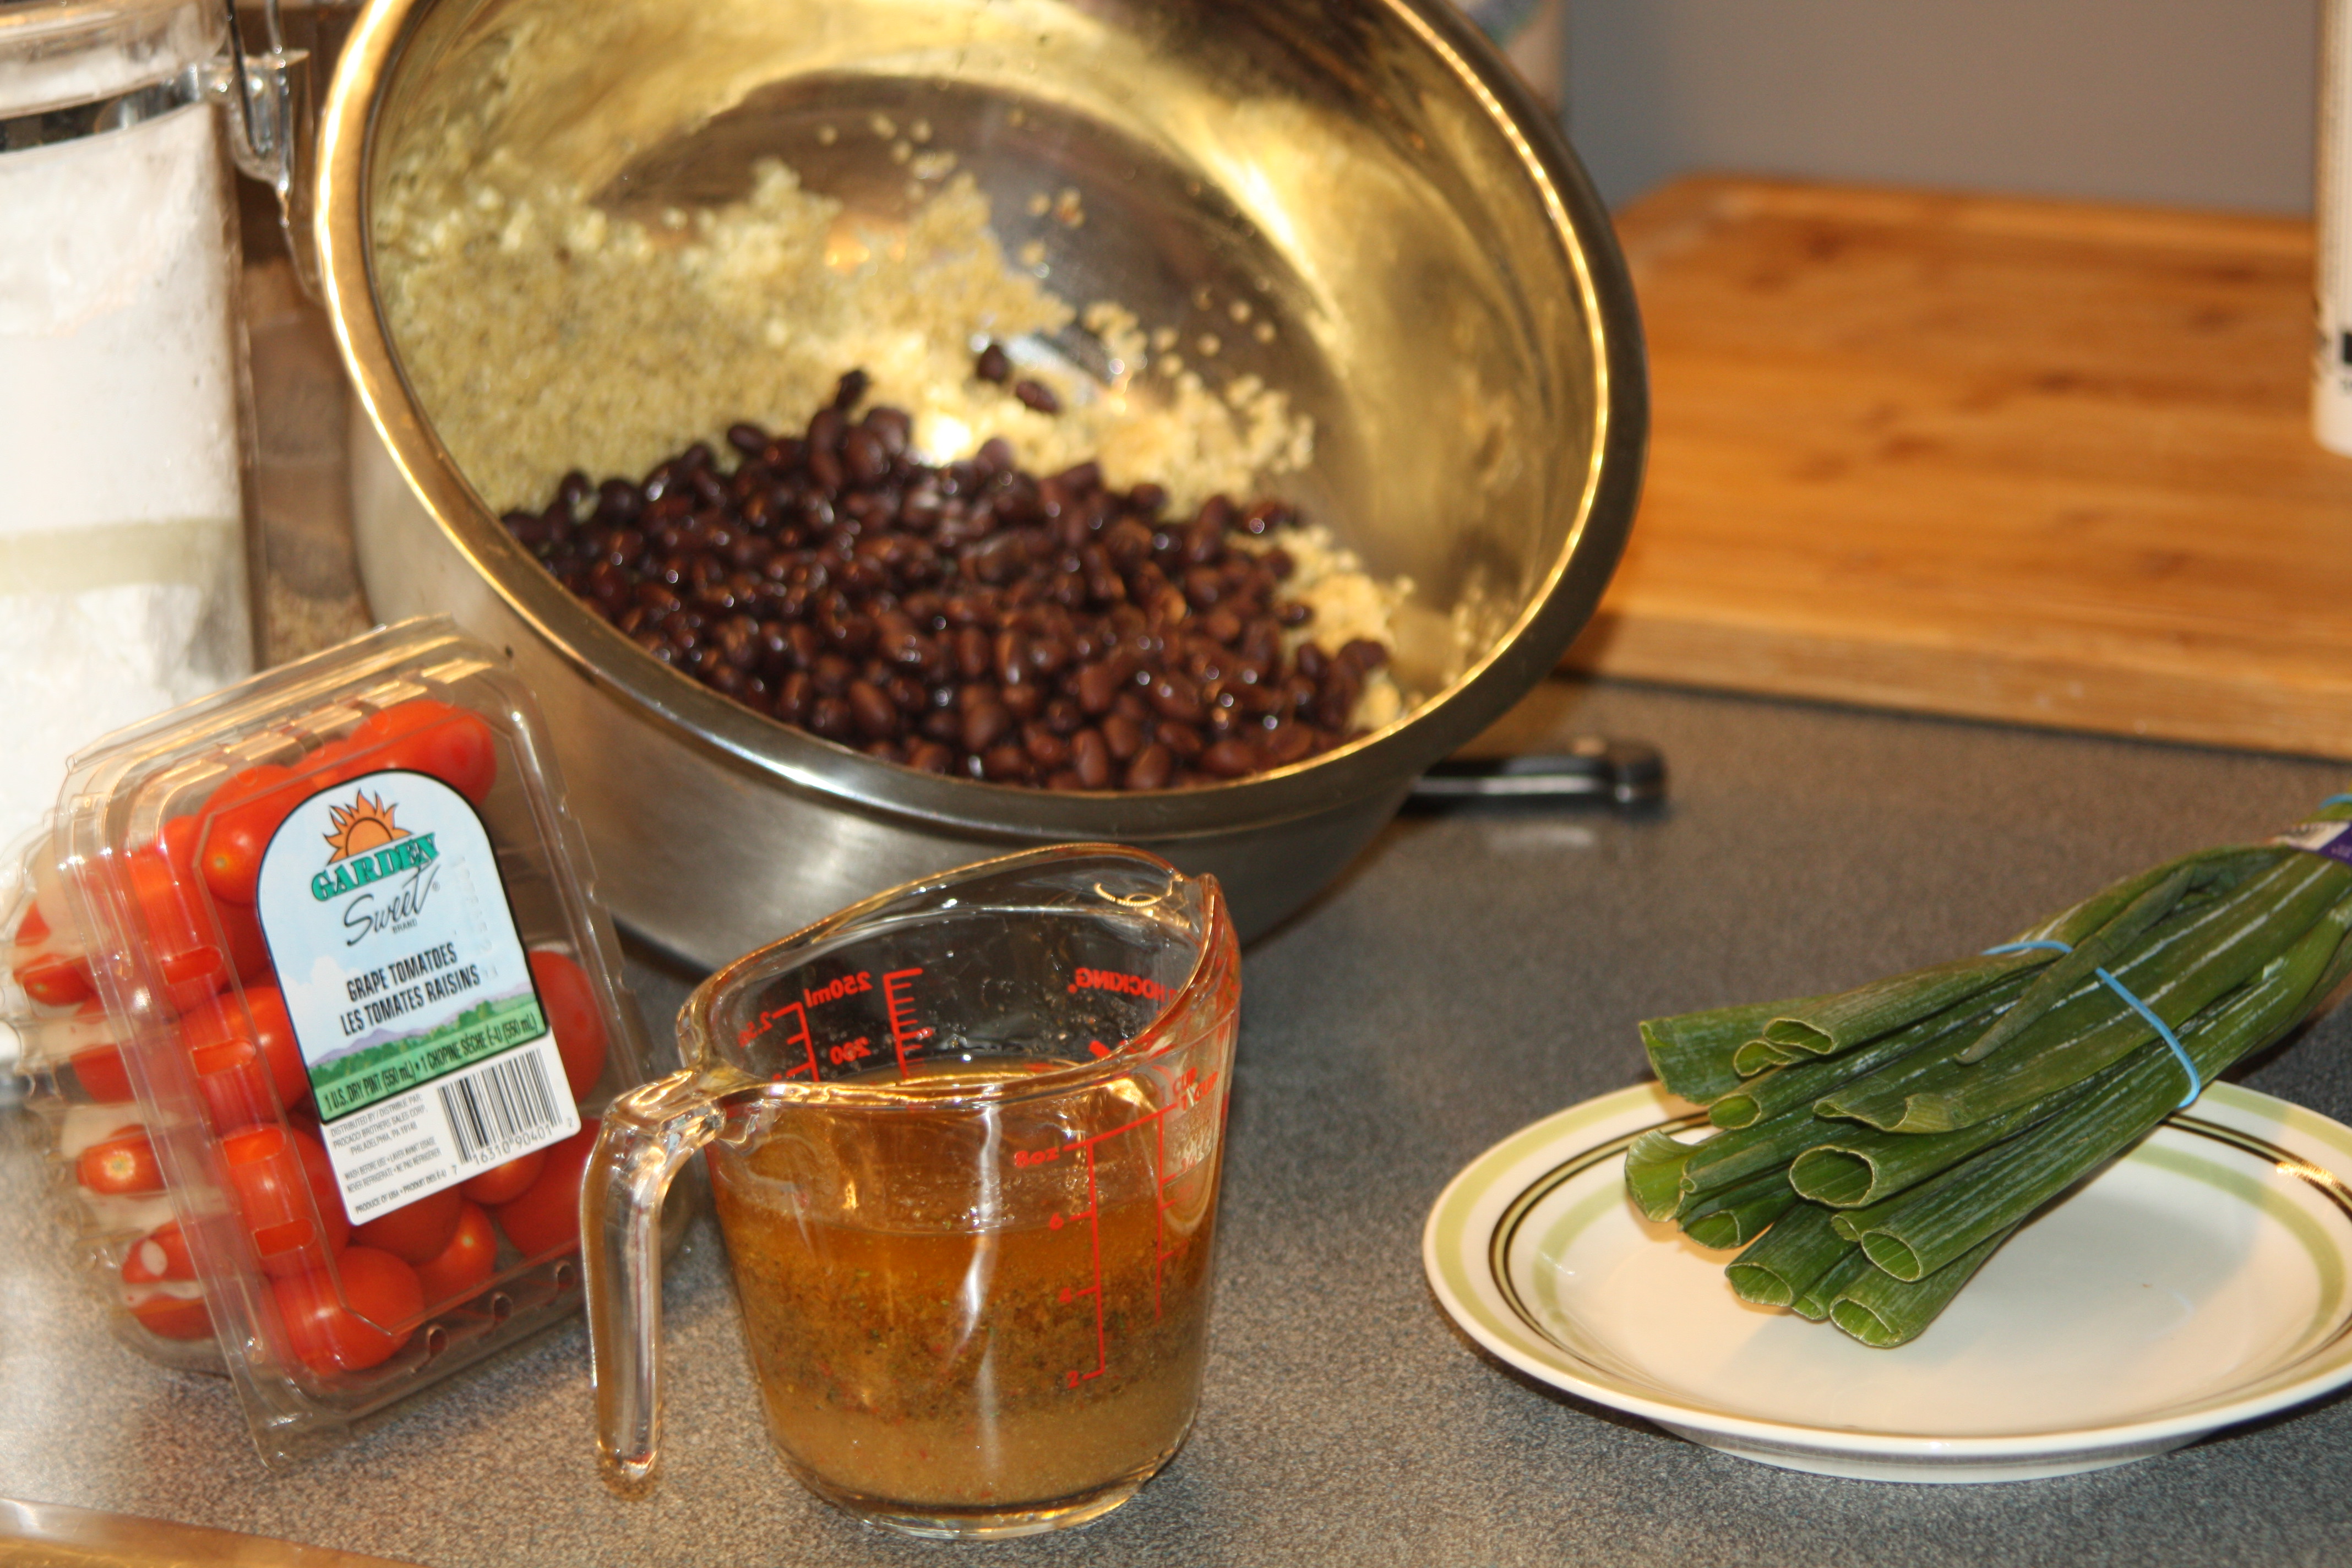
Side Dish: Zesty Quinoa Salad

I was only providing one side dish, so this was an easy one as well. When you are looking at cooking for those who need a gluten-free diet, rice or quinoa can be a great alternative to pasta. Yes, I know there are a lot of gluten-free pastas out there, but sometimes store-bought gluten-free items (like bread or pasta) can be hit or miss, so either ask your friend what they buy or avoid the pasta.
IMG_7922This salad is a family favourite, and you can easily swap out tomatoes for peppers if your crowd prefers that. The dressing is really light and again, quite simple.

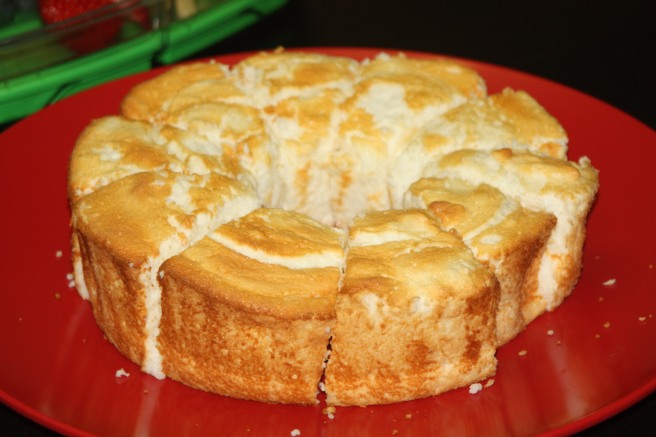
Dessert: Angel Food Cake 

So here is where I slipped up and forgot about the egg allergy. Otherwise, it was a perfect gluten-free dessert (dairy-free, too) and it turned out really well. I definitely cheated though and went to mom for this one. I didn’t have to do the work of finding a good, gluten-free recipe…I just stole one of hers from this cookbook! I also may have stolen some of the ingredients from her as well… 🙂

A good tip though – if you are cooking for someone, you may as well ask for the teaspoon of this or that. Things like xanthan gum and white rice flour can be expensive, and you likely won’t ever need them again, but your gluten-free friend will always have these things in their house and likely wouldn’t mind sharing a teaspoon of it with you.
IMG_7924Angel Food Cake
1/2 cup white rice flour
1/3 cup cornstarch
1/3 cup icing sugar
1 tsp xanthan gum
12 egg whites
1 tbsp lemon juice
1 1/2 tsp cream of tartar
1/4 tsp salt
3/4 granulated sugar
1 tsp almond extract

1. In a small bowl, sift together rice flour, cornstarch, icing sugar and xanthan gum. Resift and set aside.
2. In a separate large bowl, using an electric mixer, beat egg whites until foamy. White beating, add lemon juice, cream of tartar and salt. Continue to beat until egg whites are stiff. Gradually add sugar. Continue to beat until mixture is very stiff and glossy but not dry.
3. Sift dry ingredients, one-quarter at a time, over beaten egg whites. Gently fold in each addition until well-blended. Fold in almond extract. Spoon into prepared pan. Run a knife through the batter to remove large air bubbles. Smooth top with a moist rubber spatula.
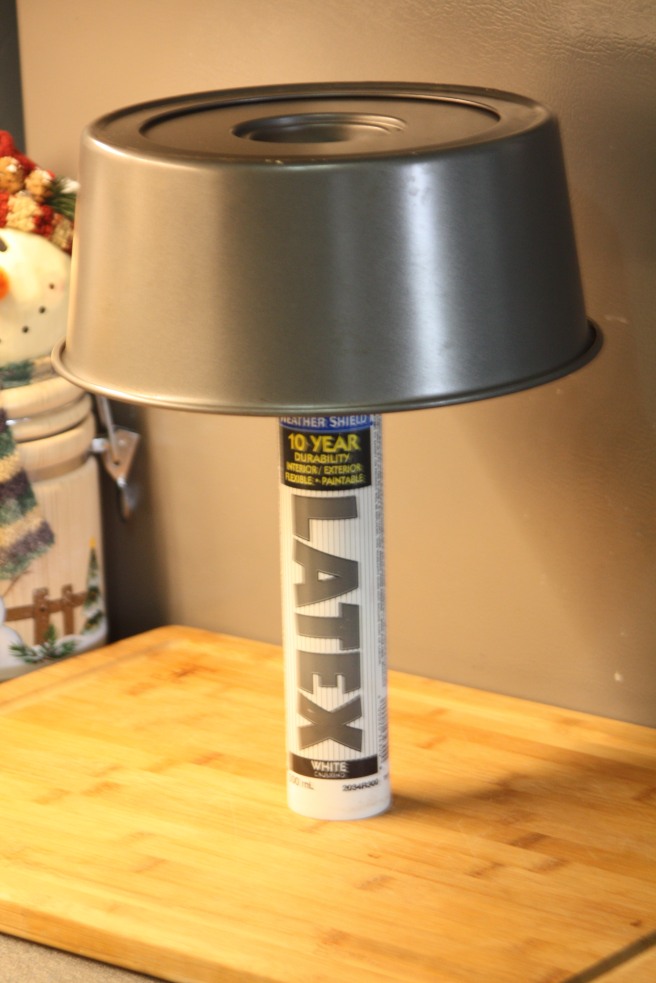
4. Bake immediately in preheated oven (350 degrees) for 30-40 minutes or until the cake springs back when lightly touched. Invert pan over a funnel or bottle until completely cooled. Using a spatula, loosen the outside and inside edges of the pan. Remove from pan.

I had to include this picture. My dad is an electrician, and sometime ago, my mom discover the perfect way to keep your angel food cake upside down while it cooled… 🙂
IMG_7915

So there you have it! You can do your part to cook for your guests and they will be wow’ed that they can eat everything….just not the egg allergy guest, she will be sad.

Pineapple Squares

Last time I posted a recipe – before our very exciting opportunity to review Kelly’s Bake Shoppe! – I did a pineapple upside down cake.  I love pineapple, so keeping in that theme I decided to try out some pineapple squares.  I have a lovely, in-house photographer (hubby) who is always a willing sampler of any and all baked goods.  Hubby grew up in a family with eleven children – yup, ELEVEN.  When there are eleven children and two parents around the table you learn quickly to eat what is put in front of you, or someone else will eat it.  Therefore, hubby is not a picky eater.  In fact, he will eat almost anything.  When we were first married, a whopping thirty-two, almost thirty-three years ago, I did try a couple of things that were an epic fail, but since then I really can’t remember much that I’ve made that he hasn’t eaten.  So, one might think that he isn’t a very good one to rely on for opinions on my recipes, but one would be wrong.  You see, hubby is also Dutch, and as such, does not mince words when he doesn’t enjoy something.  He will tell me if something tastes “like I made it because I have food allergies.”  Ha, ha.


I actually made these squares twice.  Once, for us and for the blog, and because he liked them so much, another time for hubby to take to a bbq he was attending. (I had another commitment, so couldn’t go.)  He knew two people going had dairy and gluten sensitivities, so wanted to bring something they could eat.  He came home with an empty plate, because one of the guys wanted to take the leftovers home.  So…..I’d say they were a hit!


1 cup brown sugar, packed

3/4 cup white rice flour

1/4 cup brown rice flour

1 tsp. xanthan gum

1/2 cup butter or margarine

1/8 tsp. salt

1 1/2 cups coconut

Combine above ingredients together until crumbly.  Spread about 2/3 in a greased 8 x 8 pan.  Set aside.


3/4 cup white sugar

1 tbsp. lemon juice

1 cup crushed pineapple with juice

1 tbsp. butter or margarine

3 tbsp. cornstarch

Stir the above five ingredients together in a saucepan.  Bring to a boil while stirring over medium heat.  Cool slightly.  Spread over bottom layer.  Cover with remaining crumbs.  Pat the crumbs down with your hand.  Bake at 350 degrees F for 25 minutes or until golden brown.  Cut while warm.

IMG_0456 (2)

Notes:

– These hold together really well.

– These are not low in sugar.  Ha, ha.  That may be what makes them so yummy.

– These are delicious with tea, hot or cold.   I had these with iced Sweet Pineapple Sencha – a lovely pairing!

– I used butter, but if you can’t use that, margarine would be fine.